3/26/2012

DIY: Pearly Collar

I bought a peter pan polka-dotted collared top in a sweet pink color and decided to add pearls to the collar. It so happened that I had white pearls on hand that perfectly fit the size of the polka dots. I alternated the pearls and the dots so that the collar does not appear too heavy. I sewed the first two pearls and ended up using hot glue for the rest. Oh heee, yes I cheated.  

White Pearls (so sorry, forgot what size these are)
Before (left) and After (right)
Can you tell which 2 pearls were hand-sewn ? 
The final outcome
 I have seen plenty of people wearing this top in different colors, at least now I can wear mine and stand out from the crowd. Plus the top can be worn without the need of a necklace. You can easily update your old wardrobe just by simply adding new details, such as pearls. This DIY took about less than an hour to complete :)

How about you? How do you use your pearls?

3/18/2012

The Perfect Pair of..

Mocassins!

I finally found the perfect mocassins, in leopard prints! I saw this pair lying on the side, scattered in the sea of high heeled shoes and I just had to try it on. This pair actually belonged to the "PLUS" size of shoes, where sizes runs from 41 and up. HORAY for big feet like me! I normally wear a size 39-40 but somehow I the size 41 fits me. Asian sizes always runs smaller, I have a hard time fitting into free size clothing since they fit very petite girls and I am SO not petite! 

SM Leopard Mocassins
I can't believe I bought this for only P600 from SM Department Store (local department store), looks more expensive in reality since the fabric is made of fuzzy material. 

What did you shop this weekend? :)

3/11/2012

5 minute DIYS with Fabric Tapes

Many people assume that diys are time consuming but it does not necessarily have to. Bigger projects that need more work done are obviously more time consuming but for simple ones it can be done under 5 minutes. Here are two projects I made in less than 5 minutes using fabric tapes and scissors. 

I used the fabric tapes for two projects, one as borders for my cork board and the second to decorate file clips. Simply measure the sides, cut and stick on the borders. I replaced the string on top with leftover ribbons in polka dots print. 


Cork Board
I got the idea for the file clips from the Ashley's blog, but she used textile and mod podge for her diy. The outcome is the same except for the fabric tapes, there are ridges in between for larger file clips. For the red polka dots, I wrapped the tapes around the top curves of the clip to make it look complete.

File Clips wrapped in Polka Dot Printed Fabric Tapes

5 minute DIYS

See how you can transform things in just 5 minutes? Try it out for yourself :)

3/09/2012

Leopard Nails

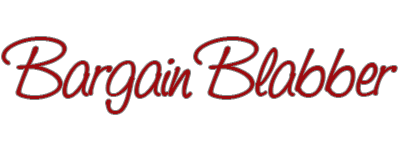
The inspiration for this plain and leopard printed nail art comes from Hanna, who is a character from the Pretty Little Liars TV series. I am fond of the styling and fashion in the show because it is both casual and youthful. Each character has her own sense of style and I find myself a mix of Spenser, Aria and Hanna. Hanna's style is trendy and sometimes over the top.  Below is a screenshot of her nails.

Hanna from Pretty Little Liar S2E17
 My version, a pink one!

A mix of plains and Leopard prints
Materials Needed:
and Water!
How to: 
1. Cut the nail stickers into individual pieces and set aside the ones to be used (alternate nails).
2. Use your tweezers to soak a piece of sticker in water for 5 seconds.
3. Peel off the sticker from the cardboard by gently sliding it.
4. Position the sticker by placing the rounded edge towards the base of your nail.
5. Cut off excess piece on top (does not have to fit the exact shape of the nail yet)
6. Apply a clear top coat 
7. After you apply the top coat, you will immediately notice the sticker to curve onto your nail, use the pusher to remove excess stickers by shaping the edges of your nail.
8. After doing this alternately, color the rest using a base coat, nail polish and top coat.

I was supposed to post a video together with this tutorial but my camera was not positioned correctly. I will try to do this on my next nail art. The nail art stickers are enough for both hands, using it alternately will only make you use half of it, making the other half available for another time :) I have a couple more stickers with different prints and I can't wait to try them out :)

I <3 Nail Art

3/04/2012

DIY Materials

I visited my niece today for the first time out of the hospital and she is such a cutie! Babies are indeed a bundle of joy! :) She was crying the whole time and wanted to sleep so I didn't stay too long. Since I was in the area, I decided to pass by 168 mall/ Divisoria to shop for some DIY materials. 168 Mall is a mall full of small clustered stores that sells everything and anything. From clothes, bags, toys to nail arts and home decors. It is best to buy in bulk and to HAGGLE the price. Divisoria, on the other hand, sells mostly materials such as plastics, paper, sewing materials and many more.  Below are what I was able to grab.  

GEM BRADS - I was looking all over Divisoria for spikes and studs and apparently I was browsing at the wrong street. The only studs I could find were the plain silver circular ones. I didn't bother going to the correct street because it was so traffic with people! The other gems below are actually scrapbook-making materials and are called brads, my first time to encounter the term. I think it can be used on textile.  

Studs and Gem Brads
FABRIC TAPES - another first encounter for me. I never knew these existed. The only patterns available were polka dots, florals and checkers. I chose the ones that I think would be more versatile. I hope it sticks well, which means that I need to test this out.

Fabric Tapes
 HELLO KITTY ORGANIZER - I have to place my DIY materials somewhere right? Might as well place it somewhere cute :) I love the details, the furry eyes, ribbon and the Hello Kitty shaped compartment in the center <3

Hello Kitty Organizer

Hello Kitty Organizer
Tune in for upcoming DIYs :) Have a great weekend!